Stripe – Setup Documentation
The following setup documentation is for the Stripe payment gateway. Stripe Standard is included with the free version of Easy Digital Downloads. Stripe Pro payment gateway extension is an optional extension that adds support for Preapproved Payments and removes the fee added to Stripe Standard payments.
In this article
Configure Stripe
Webhook configuration
Recurring Payments Integration
Settings & Features
Payment Descriptors
Buy Now
Apple Pay Setup
Test Purchases
FAQs
Configuring Stripe
In order to use the Stripe payment gateway, you must first have a Stripe account. It’s free to create a Stripe account, and testing it is also free. Also, see Stripe’s business information requirements.
India Accounts: Businesses signing up to Stripe in India will experience a waiting period to activate their account and start processing payments. You can learn more about this change by here.
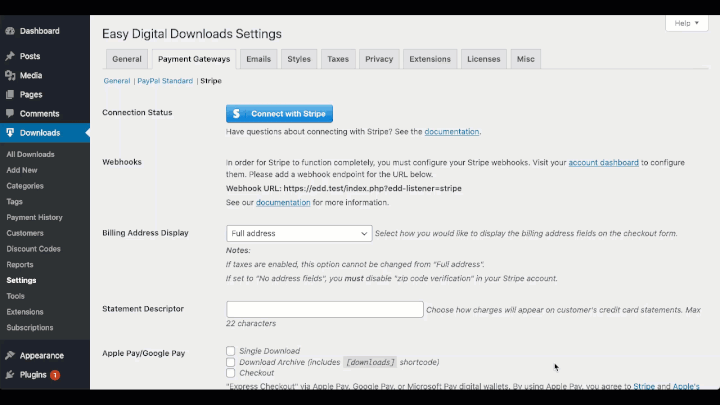
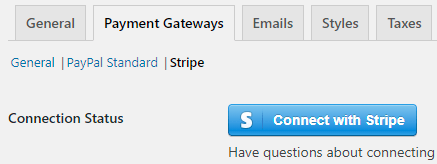
1. Connect with Stripe
Select the Stripe sub-tab within the Payments tab, then click the Connect with Stripe button.

This will take you to the Stripe website where you can log into your existing account if you have one or create a new account if you do not.
2. Enable the Stripe Payment Gateway
Go to WordPress admin → Downloads → Settings → Payments, then enable the Stripe payment gateway.

3. Webhook configuration
The Stripe payment gateway can automatically detect refunded purchases in your Stripe account. When a refund is detected, the corresponding purchase in EDD is also marked as refunded.
EDD creates a webhook for you, and you simply need to tell Stripe where it is. If webhooks are not configured properly or are blocked by a plugin or configuration of your site, this automatic refund detection will not function.
1. To add the appropriate webhook endpoints, in your Stripe dashboard go to Developers → Webhooks (direct link). We recommend creating two webhook endpoints: one for test mode and one for live mode. If you create both, you’ll need to repeat the below process after toggling modes.
2. Click + Add Endpoint
3. Add the following URL:
https://example.com/?edd-listener=stripe
Note: Replace “example.com” with your actual site URL. The exact URL you need to enter can be found in your WP admin under Downloads → Settings → Payments → Stripe.
4. Listen to: Select “Events on your account”
5. Version should be set to “Latest API version”.
6. Select events to listen to: Select All Events or if you want to limit to only the required events you can select the following events:
charge.dispute.created
charge.refunded
charge.succeeded
customer.subscription.created
customer.subscription.deleted
customer.subscription.updated
invoice.payment_failed
invoice.payment_succeeded
review.closed
review.opened
Example of how the Endpoint settings should be configured:

After you add the endpoint you will see the new URL listed in the webhooks settings.

Note: Your webhooks won’t work out of the box in a local development environment like Vagrant, WAMP, MAMP, Desktop Server, or Local by Flywheel. These are typically non-publicly accessible IP addresses and Stripe can’t reach them.
4. Recurring Payments Integration (Required to sell subscriptions)
The Stripe payment gateway has complete support for the Recurring Payments extension. See the Recurring Payments Stripe setup documentation for configuration instructions.
Additional Settings / Features
There are additional settings and features detailed below.

Billing Address Display
This drop-down field will allow you to select which billing details are collected. There are three options:
- Full address – This will result in a complete address form with street, city, country, state / province, and zip / postal code being displayed.
- Zip / Postal Code and Country only – This will result in a simplified address form being displayed that asks only for zip / postal code and country.
- No address fields – This will result in no address fields being displayed.
Billing address notes
- Taxes note: if you have taxes enabled, only the full address option may be used as those fields are required for accurately calculating taxation amounts.
- Fraud note: collecting a full billing address can help reduce fraudulent charges. It is recommended that minimum zip / postal code and country be collected.
Statement Descriptors
A short description of the purchase will show up on the bank/card statement alongside the charge. The descriptor is set via your Stripe Settings and should be 5-22 characters.
Include Purchase Summary is an optional setting if you want to include the product(s) name in the descriptor. This utilizes the Stripe Shortend descriptor to allow you to set a shorter name so the remaining characters use the product name. For example, if your Shortend descriptor is ACME and your product name is Easy Digital Downloads, Stripe will set the descriptor to “ACME* EASYDIGITALDOWNL”. The product name is cut off in this example due to the 22-character limit. The * is added by Stripe and cannot be removed.
Import Notes:
1. Only 22 characters are allowed for statement descriptors. Therefore, if your product name is too long, it will be truncated.
2. Payment descriptors managed by the card issuer/bank. While you can specify a descriptor, the bank may or may not use it exactly as specified. See this Stripe doc for details.
Note, when a product is configured as a subscription using our Recurring Payments extension, the behavior is slightly different for the Renewal Payments. See the Recurring Payments with Stripe documentation for details.
Preapproved Payments (Stripe Pro Feature)
Check this if you would like to collect payment information but not collect the payment until a later date. Typically, this option is used for pre-orders. To process the payment and provide access to your download(s), click “Process” in the “Status” column when viewing the Payment history list.
Note that most typical stores will not need this option.
Note: When enabled, this affects all Stripe payments for all products.
Restrict Stripe Assets
This setting prevents Stripe assets from loading on every page. Most sites should not enable this setting. Stripe advises that their JavaScript library be loaded on every page to take advantage of their advanced fraud detection rules. If you are not concerned with this, enable this setting to only load the JavaScript when necessary.
Buy Now
If you meet the Buy Now requirement, this will allow customers to checkout via a popup modal. For details on how this works, see our Buy Now Buttons documentation.
Apple Pay Configuration
In order to use Apple Pay you will need to register your domains inside your Stripe account.
Note: We attempt to register your domain for Apple Pay inside your Stripe account automatically once you connect but in some cases, you might need to do this process manually.
Please review the instructions available here
To use Apple Pay, you need to register with Apple all of your web domains that will show an Apple Pay button. Go to the Apple Pay tab in the Account Settings of your Stripe Dashboard.

If the domain registration fails, you’ll need to check for the domain association file on your host. The EDD Stripe extension will attempt to do this automatically when you enable one of the Express checkout options above for the first time. To confirm that the file was properly added, follow these steps from Stripe which explain how to manually add it.
Once you’ve registered your domains, you’ll be able to make payments in your store with Apple Pay, using Safari web browser. For more details see Stripe’s doc on Verifying your domain with Apple Pay.
Testing Stripe
You can test Stripe in Test Mode which allows you try out the payment process without using a real credit card. Stripe offers test cards for this process (see below).
1. Enable EDD Test Mode
Navigate to Downloads → Settings → Payment Gateways and enable Test Mode.
2. Connect with Stripe
Select the Stripe sub-tab within the Payment Gateways tab, then click the Connect with Stripe button. If you’ve already connected to Stripe with Test Mode disabled, you will have to connect again in Test mode. Once you are connected in both Live and Test Mode, you do not need to re-connect when switching back and forth.
This will take you to the Stripe website where you can log into your existing account if you have one or create a new account if you do not.
Stripe Temporary Test Account

Stripe offers a temporary test account by clicking “Skip this form”. We do NOT recommend this option as it’s best to use an actual account, the same account as your live account. This allows you to configure webhooks and ApplyPay once for both Live and Test Mode. Also, if you are testing Recurring Payments, renewals will not work with a temporary test account.
3. Testing a Purchase
Now in test mode, add a product to your cart and proceed to checkout.
You can use the card number 4242424242424242 with any CVC and a valid expiration date (any date in the future).

Testing Express Checkout (Apple Pay / Google Pay)
To test these methods, you must have a payment method added.
Apple Pay
A live card must be added to your Apple Pay wallet, but when Test Mode is enabled, live funds are not used when testing.
Google Pay
Google Pay allows you to add any Stripe Test Card. It should be added under chrome://settings/payments; if no test card exists (even with a live card listed) you may not see the Google Pay button.
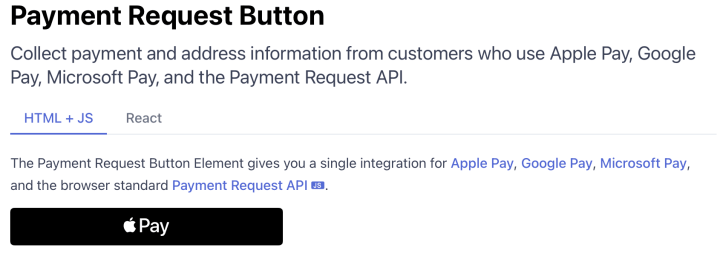
If Express Checkout buttons are not appearing, you can test your browser(s) here:
https://stripe.com/docs/stripe-js/elements/payment-request-button
You should see the appropriate button appear at the top of the page (see screenshot below). If it doesn’t appear, it is due to your browser:
Apple Pay is available but fails to process payment:
Try re-registering your domain with Apple Pay by removing your site and registering it again.
Additional Resources
See Stripe Testing for more test card number and additional testing options.
FAQ
Q: How to manage payment methods with Stripe
A: By default, the Stripe payment gateway includes credit card, Apple Pay, Google Pay and Link. Some stores may choose to disable one or more of these payment methods. This is done via your Stripe account settings.
Go to Payment methods (Stripe.com Settings > Payment methods) and select Easy Digital Downloads under “Select your platform”:

This shows a list of all of Stripe’s available payment methods. Note, EDD does not support all payment methods, therefore Blocked (unsupported) methods cannot be enabled.
To disable a supported payment method, select that method and click the Turn off button. The payment method will no longer appear as an option during checkout.

To re-enable, click Turn on next to the payment method.
Q: How do I accept Discover, JCB, and Diner’s Club with Stripe?
A: When using the Stripe Payment Gateway, the accepted forms of payment can change depending on the currency your store is configured with. Below is a table explaining which payment methods are accepted for currencies:
| USD | Non-USD | |
| Visa | ✓ | ✓ |
| Mastercard | ✓ | ✓ |
| American Express | ✓ | ✓ |
| Discover | ✓ | |
| Diner’s Club | ✓ | |
| JCB | ✓ |
You can read more about the currencies accepted by Stripe in their documentation.
Q: How do I remove the additional 3% fee from my Stripe transactions?
A: You will not incur an additional 3% fee from your Stripe transactions if you purchase a license to an EDD Extended (or higher) Pass or the individual Stripe Pro extension. The Stripe Pro extension must also be installed and activated.
Q: What features does the Stripe Pro extension have that the free version of Stripe in EDD does not?
A: Currently, the Stripe Pro extension adds the ability to accept pre-approved payments.
Q: Does the 3% fee apply to PayPal?
A: No, the 3% fee only applies to transactions processed through Stripe when using the free version of Stripe.
Q: Does the 3% fee apply to recurring Stripe transactions?
A: No, the 3% fee only applies to the initial transaction. If you’ve installed both our Stripe Pro and Recurring Payments extensions together (both included in our Extended (or higher) Pass, you will not incur this additional initial transaction 3% fee.
Q: Can I connect to my Stripe account manually using my Stripe API keys?
A: In order to provide the best experience, we only offer Stripe Connect as for integrating with Stripe.
Q: Can I downgrade from Stripe Pro to Stripe Standard?
A: Yes, you can deactivate and delete the Stripe Pro extension and Stripe Standard will automatically take over. Log into your account to cancel your Stripe Pro subscription.
Migrating to Payment Elements
Note: The following section is only applicable to customers who used our Stripe integration prior to the introduction of Payment Elements. These stores have been given access to an option to switch to Payment Elements during the initial phase of this release, allowing them to verify any customizations to their checkout page are not affected during the update, before making the switch to Payment Elements via their EDD Stripe Settings.
If you used our Stripe integration before the introduction of Payment Elements, we’ve given you temporary access to a setting called “Elements Mode” in Downloads > Settings > Payments > Stripe. Upon updating, your store will remain on Card Elements, and give you the ability to switch to Payment Elements only after you’ve confirmed your checkout works with it.
If your checkout page has been customized, refer to this document for additional details about what will need to be updated.
Caching plugins or services
Upon changing to the Payment Element, ensure that you flush any caches you may have, including page caching, object caching, and services like Cloudflare, to ensure that the proper Javascript and CSS files are being loaded.
Deprecated settings and their alternatives
With the introduction of Payment Elements, there have been some changes to the settings available within the EDD Stripe integration. We’ve added as much feature parity as possible, while still providing an optimal integration.
Previously Used Cards
The legacy card elements used the Stripe API to look up previously used payment methods for users when they were logged in. With the new Link integration built into the Payment Element, users can now authenticate and save cards with the Link by Stripe service. This is far more beneficial as it offers a more secure way to save cards, gives users the option to save their card, and the legacy card element only showed cards used on your store, where as the Link saved cards are global and apply to any store using the Link integration.
Split card fields
This feature is not officially supported in the Payment Elements, and has been deprecated.
Apple Pay/Google Pay
These methods appear by default and will show when relevant to users, in a non-intrusive way, alongside the other payment methods that are supported by their browser.

Prepaid Cards
With the introduction of Stripe’s Radar feature, you can more reliably restrict cards at the Stripe level, instead of relying on our setting. To learn more about how to create rules, view Stripe’s Radar Rules documentation, which has examples for blocking or allowing prepaid cards.